
#PowerHack🔮 2 - creating a clickable link in Power Apps WITHOUT the Launch() function
Welcome to another episode of my #PowerHack🔮 series! In today’s post I will show you how to create a clickable link in Power Apps without using the Launch() function.
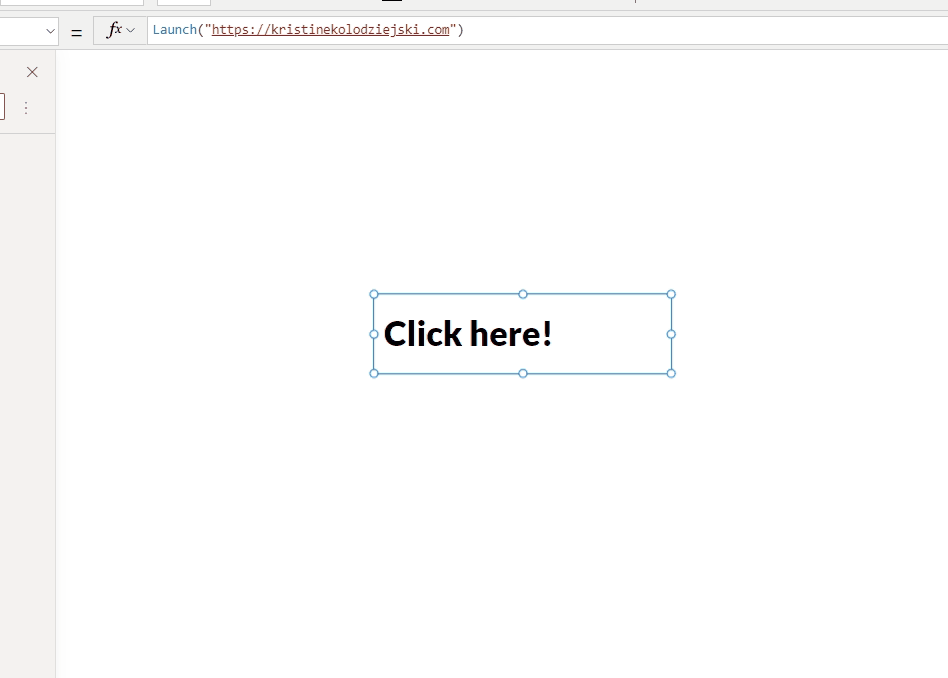
Before we dive into the topic, let’s look at the traditional way of creating hyperlinks in Power Apps. To open an external resource in our browser, we would usually use the following syntax
Launch(“URL”)
which we’d then insert into the OnSelect of a button or a label.
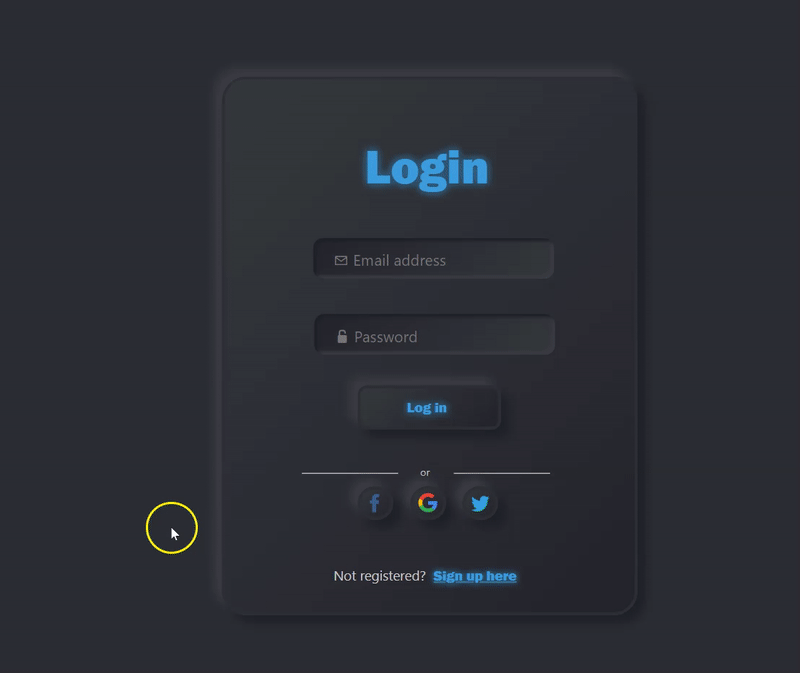
While it will work successfully and open the hyperlink in a new tab in your browser session, there are two big issues with using Launch() in the OnSelect of a label. In line with WebAIM's accessibility guidelines, hyperlinks should meet two key criteria:
The link text must have a 3:1 contrast ratio from the surrounding non-link text.
The link must present a "non-color designator" (typically the introduction of the underline) on both mouse hover and keyboard focus.
We can indeed manipulate the text properties and give the label different colour and even underline it, we won’t however be able to create the on hover effect with just a label (you could do this with layering a transparent button on top, but that’s already 2 additional controls in your app!). As you will see from the GIF above, when we hover over the labe, we just get the text selector as opposed to hover effect.
So… how can we fix it? It’s very simple! You’ll know already that I love the HTML control.. and this is exactly how we will fix the issue.
To achieve this, we will use what’s called the href attribute in an <a> (anchor) tag. This is the easiest ways to create hyperlinks in pro-code development, and we are going to use this method here too. Please don’t be afraid of the code - it’s actually way simpler than you think!
Firstly, let’s add a HTML control to our app.

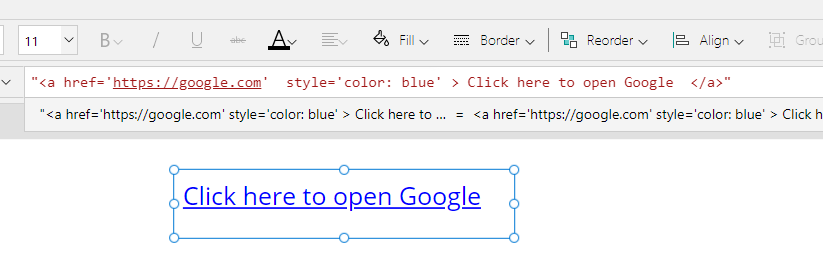
Now let’s look at the syntax we will be using. It consists of a couple of elements - an opening <a> tag with the href attribute, the text we want to display, and a closing </a> tag.
<a href="our URL goes here"> the text we want to display for the link </a>
So to construct a link to open Google, with the text saying “click here to open Google'“, our syntax will look like this:
<a href="https://google.com"> Click here to open Google </a>
If you look closely at the syntax of our HTML control, you’ll notice that it is already enclosed in double quotes(“). This means that to use a hyperlink in our HTML control, we will need to change the double quotes (“) inside the <a> tag to single quotes(‘).
<a href=’https://google.com’> Click here to open Google </a>
We then need to wrap the whole formula in double quotes - here’s the complete snippet:
"<a href='https://google.com'> Click here to open Google </a>"
And this is the result it will produce:

Perfect! In most scenarios, you will likely want to style it up a little bit. To do this, we will need to use some inline CSS - again, it’s much simpler than it sounds! To add styling using inline CSS, we have to use the style attribute within the <a> tag. Here’s the syntax:
<a href=’https://google.com’ style=’styling properties go here’ > Click here to open Google </a>
As an example, if you want to change the colour to blue, you’ll do this:
<a href='https://google.com' style='color: blue' > Click here to open Google </a>
Which will produce this result:
And here’s an example with additional styling against a dark background and a glowing effect. To create the glow around the edges, I just used the text-shadow property.

And the complete snippet for the formatting above:
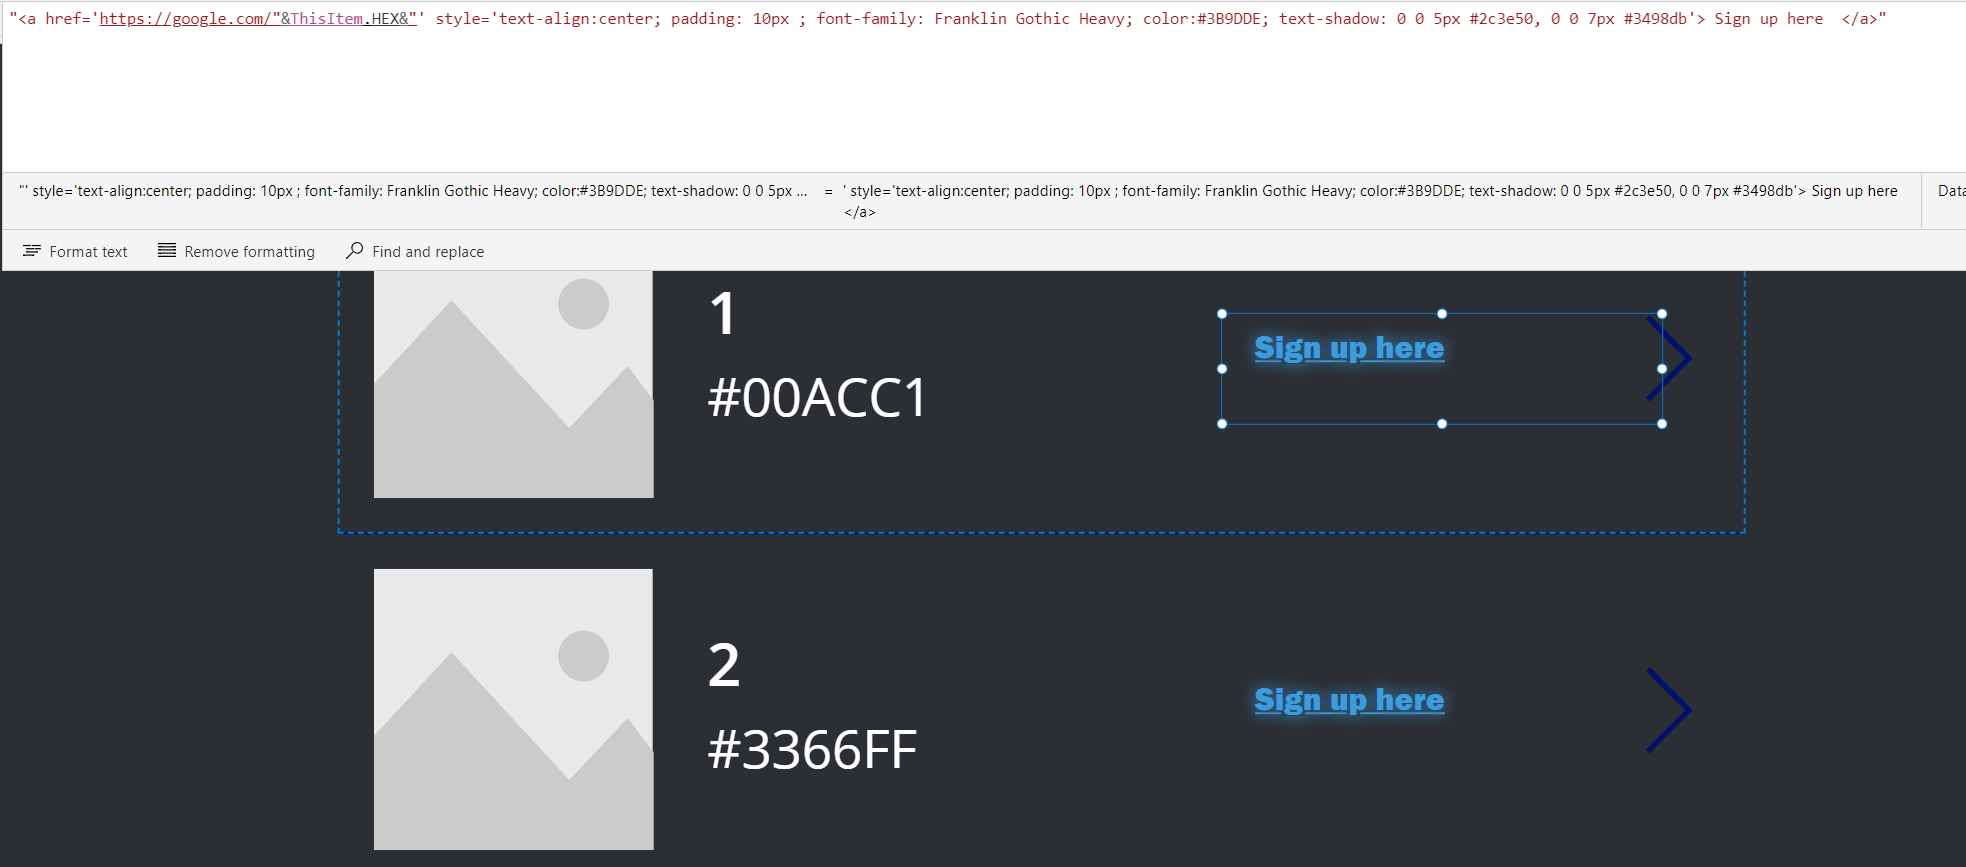
"<a href='https://google.com' style='text-align:center; padding: 10px ; font-family: Franklin Gothic Heavy; color:#3B9DDE; text-shadow: 0 0 5px #2c3e50, 0 0 7px #3498db'> Sign up here</a>"
The additional benefit of this method is that your user will be able to see where the link will direct them to when they hover over it:

This method also works seamlessly in Galleries. Let’s say you’d like to create a clickable link to open a record for each gallery. All you need to do is use ThisItem.GUIDoranyotherattribute and enclose it in “& to open the reference, and then close it with &” (if you’ve read my previous blog posts, you’ll know this already! 😊). Here’s a Gallery example, in my instance HEX is the parameter I want to pass to the link.
If you’d like to learn more about text styling, here’s a great introduction to text styling properties that you can explore further!
I hope you enjoyed this hack - as always, thank you very much for visiting and I hope to see you again! Don’t forget to subscribe below if you’d like to be notified about new blog posts! 😊